Day-8:AWS Command Line Interface(CLI)
The AWS Command Line Interface (AWS CLI) is an open source tool that enables you to interact with AWS services using commands in your command-line shell. With minimal configuration, the AWS CLI enables you to start running commands that implement functionality equivalent to that provided by the browser-based AWS Management Console from the command prompt in your terminal program:
Linux shells – Use common shell programs such as
bash,zsh, andtcshto run commands in Linux or macOS.Windows command line – On Windows, run commands at the Windows command prompt or in PowerShell.
Remotely – Run commands on Amazon Elastic Compute Cloud (Amazon EC2) instances through a remote terminal program such as PuTTY or SSH, or with AWS Systems Manager.
To install the AWS CLI version 2, see Install or update the latest version of the AWS CLI.
aws --version
The following
aws configurecommand example demonstrates user input, replaceable text, and output:Enter
aws configureat the command line, and then press Enter.The AWS CLI outputs lines of text, prompting you to enter additional information.
Enter each of your access keys in turn, and then press Enter.
Then, enter an AWS Region name in the format shown, press Enter, and then press Enter a final time to skip the output format setting.
The final Enter command is shown as replaceable text because there is no user input for that line.
aws configure
AWS Access Key ID [None]:
AKIAIOSFODNN7EXAMPLEAWS Secret Access Key [None]:wJalrXUtnFEMI/K7MDENG/bPxRfiCYEXAMPLEKEYDefault region name [None]:us-west-2Default output format [None]:ENTERGet started with the AWS CLI
This section provides links to information on how to get started with version 2 of the AWS Command Line Interface (AWS CLI).
Prerequisites to use the AWS CLI version 2
To access AWS services with the AWS CLI, you need an AWS account and IAM credentials. When running AWS CLI commands, the AWS CLI needs to have access to those AWS credentials. To increase the security of your AWS account, we recommend that you do not use your root account credentials. You should create a user with least privilege to provide access credentials to the tasks you'll be running in AWS.
Create an IAM or IAM Identity Center administrative account
Next steps
After creating an AWS account and IAM credentials, to use the AWS CLI you can do one of the following:
Install the latest release of the AWS CLI version 2 on your computer.
Install a past release of the AWS CLI version 2 on your computer.
Access the AWS CLI version 2 from your computer using a Docker image.
Access the AWS CLI version 2 in the AWS console from your browser using AWS CloudShell. For more information see the AWS CloudShell User Guide.
→ Go to your CMD and type
aws configure→ Enter the Access key ID, Secret Acess Key, Region and the Output Format (default is JSON) for your commands.
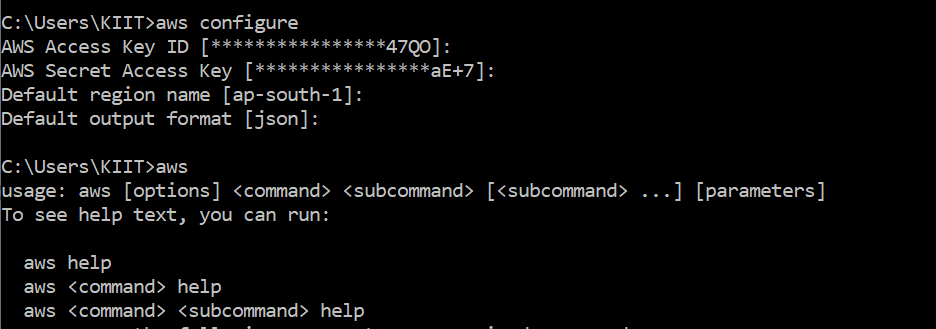
done with the setup
LAB
This practical consists of the following tasks:
🔅 Create a key pair
🔅 Create a security group
🔅 Launch an instance using the above created key pair and security group.
🔅 Create an EBS volume of 1 GB.
🔅 The final step is to attach the above created EBS volume to the instance created in the previous steps
1. Create a key pair
aws ec2 create-key-pair --key-name myclikey


2. Create a security group
aws ec2 create-security-group --group-name aws_cli_intro --description "aws cli" --vpc-id vpc-2ef81845


Adding ingress rules to a security group:
aws ec2 authorize-security-group-ingress -- group-id sg-02915ad4c4814ecda --group-name aws_cli_intro --protocol tcp --port 22 --cidr 0.0.0.0/0
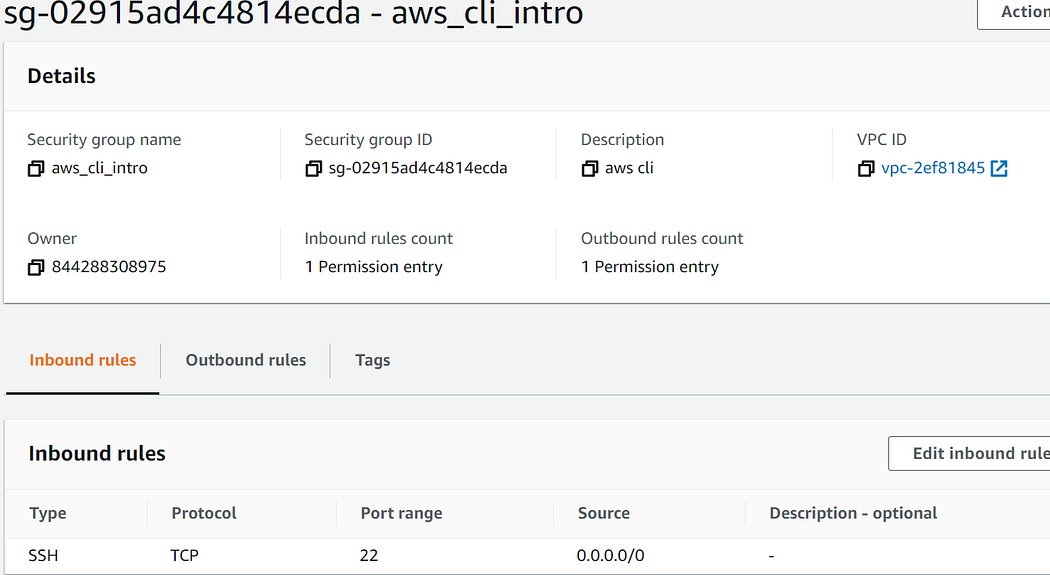
3. Launch an ec2 instance
aws ec2 run-instances --image-id ami-0e306788ff2473ccb --instance-type t2.micro --count=1 --subnet-id subnet-1ce09f50 --security-grou


4. Create an EBS volume of 1 GB
aws ec2 create-volume --availability-zone ap-south-1b --size 1

5. Attach the volume to the instance
aws ec2 attach-volume --volume-id vol-09866940fb6a5eb52 --instance-id i-0

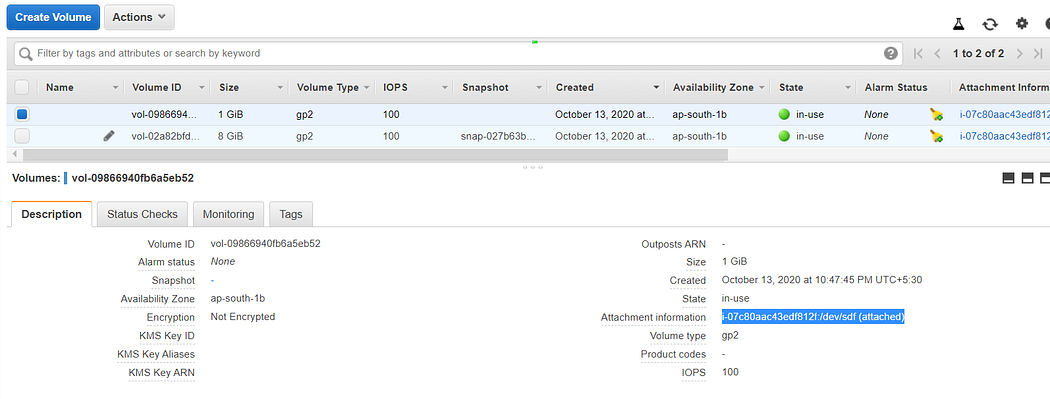
Now we can do remote login using
ssh -l ec2-user <public IP> -i myclikey.pem

And further, create partition and store data
→Create partition:
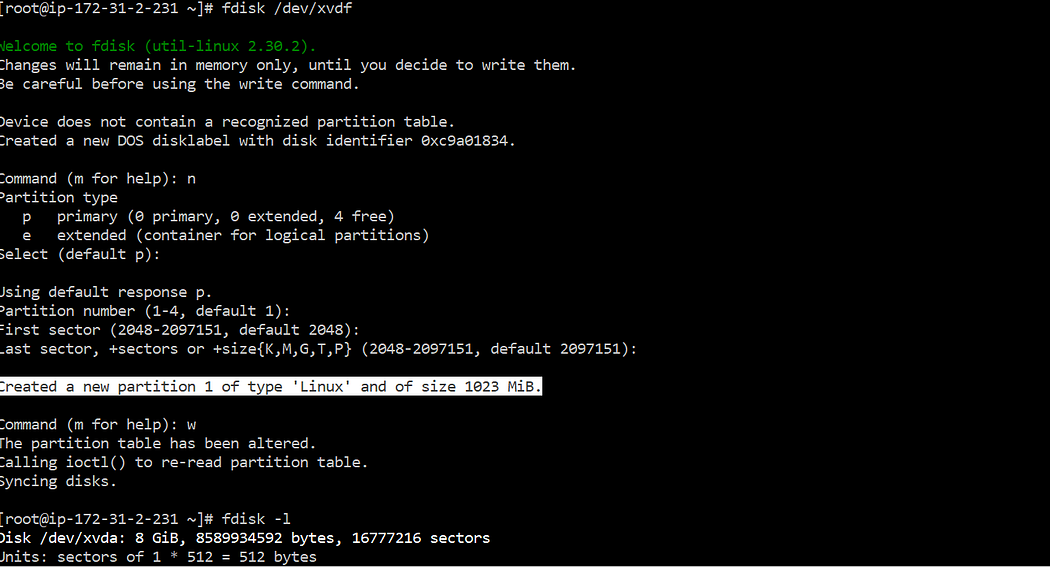
→ Format partition:
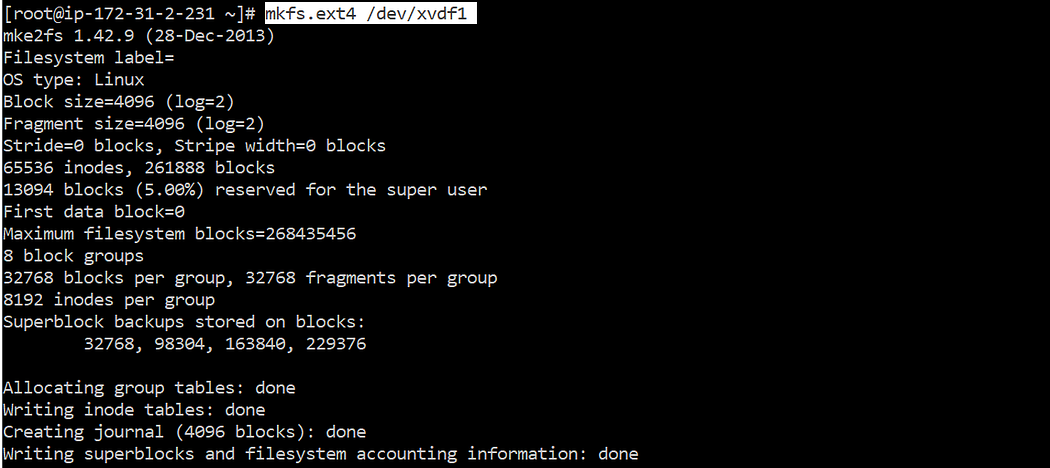
→ Mount Partition:
